
Keep, Use, Sell, Or Drop Checks
| Check | Why it matters | Action |
|---|---|---|
| Use on the next run | Food, fuel, ammo, medicine, and repair supplies can be more valuable as run stability than as cash. | Keep enough for the next route before moving anything to the sell area. |
| Keep for build | Mechanical parts, weapons, modules, and crafting-looking items can unlock or support the next Trampler plan. | Check the near-term build or crafting need before selling a rare-looking material. |
| Sell surplus | Clear duplicate supplies, overflow materials, and cash-focused valuables become useful once the route is safe. | Move only confirmed surplus into the shop sell area, then check the total before confirming. |
| Drop on route | A profitable item can still be wrong if carrying it delays extraction. | Drop low-confidence clutter before it makes the Trampler harder to store, repair, or board. |
| Check database | SAND Game DB item pages help verify whether an item is a weapon, consumable, valuable, or material. | Use database categories as a cross-check, not as a permanent price promise. |
| Recheck after patch | Economy, crafting needs, and item values can move during Early Access. | Recheck high-value items after updates before treating old sell advice as final. |
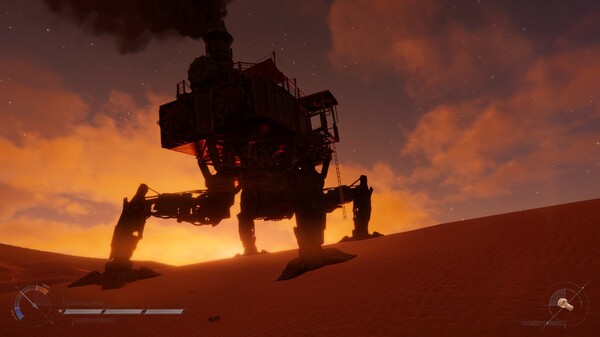
Sell Decisions Happen After Safety
Players want to know what to keep, what to sell, and how to avoid selling future build materials by accident.
Every Item Looks Useful Early
Material pages become confusing because every item looks potentially useful early on. Selling too much slows progression; hoarding too much clogs storage; making the decision before extraction can lose the haul before the shop ever matters.
Inventory Pressure Changes Value
The cause is two different inventories: route inventory and base storage. On the route, value is only useful if it can be stored and extracted. At base, value changes again because Trampler parts, crafting materials, supplies, weapons, and clear valuables all compete for the next run.
Use Four Item Buckets
Use a four-bucket decision after extraction. If the item supports immediate survival, use it. If it supports a near-term Trampler build, weapon, or crafting requirement, keep it. If it is surplus or clearly a cash item, sell it through the shop UI. If it blocks a safer route before extraction, drop it.
- Never make SAND sell items decisions while the extraction route is still unsafe.
- After extraction, compare storage, equipment needs, and the next Trampler build before selling materials.
- Use the shop flow only after checking the storage tab, sell area, total value, and confirmation prompt.
- Treat red/green/brown boxes, black-box finds, mechanical parts, and beacon/crate rewards differently instead of selling by color alone.
- Re-check item value after patches, economy changes, or database updates.
Item Selling Mistakes
- Selling rare-looking material before knowing build requirements.
- Hoarding low-value clutter that delays extraction.
- Using one video as a permanent price table.
- Making inventory choices before extraction is secured.
- Selling valuables because the label sounds like cash even though the item can have a crafting use.
- Dragging items into the sell area without checking the final total and confirmation.
Do Not Sell Before The Loot Is Safe
The first SAND sell items rule is boring because it saves money: do not make a sale plan while the extraction route is still collapsing. A box on the Trampler floor is not profit. A rare item in the wrong player inventory is not profit. A tower call without boarding is not profit.
Get home first, confirm what actually returned to storage, then open the shop or stash decision.
- Store boxes before driving away from the POI.
- Extract with the loot carrier, not just the driver.
- Check storage after the run before blaming the shop or vendor.
- Do not sell the first copy of a strange material until you know whether a build needs it.
- Sell duplicates and overflow after the next route is supplied.
Use The Shop Flow Deliberately
Games.GG describes the practical buy/sell flow as a shop interaction, storage view, sell area, total value check, and confirmation. That is useful because the dangerous mistake is moving items too quickly and only noticing the total after the wrong item is gone.
Treat the shop as a confirmation screen, not a dumping ground.
- Open storage first and scan for build-critical items.
- Move only confirmed surplus to the sell area.
- Check the sell total and the item list before confirming.
- Back out if a weapon, module, black-box item, or crafting material is mixed into the pile.
- After selling, restock the next route before spending the cash.
When In Doubt, Keep One Copy
A lot of early SAND sell items mistakes come from treating every valuable label as vendor trash. Community keep/sell/use discussions show why that is risky: a thing can look like cash and still matter for crafting or progression.
If you do not know what an item does, keep one copy until a database, build requirement, or in-game prompt proves it is safe to sell.
- Keep one copy of unfamiliar materials.
- Keep items tied to the next Trampler or weapon upgrade.
- Sell duplicates once storage pressure is real.
- Sell after patch-sensitive value checks, not from old memory.
- Drop only when the item makes the active extraction attempt worse.
Sources and Version Notes
Verified July 12, 2026. Store price, platform status, server health, player-count snapshots, database stats, and build advice can change after patches.
FAQ
What should I check first in SAND sell items?
Make sell decisions after safe extraction. Sort items into use on the next run, keep for build, sell surplus, or drop if risk is too high.
How often should I re-check SAND sell items?
Re-check it after major patches, store-page changes, server incidents, or when a community report contradicts an older guide.
Is this official guidance for SAND sell items?
No. Use it as independent fan guidance and open the linked official or community sources before relying on important claims.